Fender introduce another custom re-issue amplifier, the ’57 Bandmaster Amplifier, featuring all-tube hand-wired circuitry based on late ’50s Bandmaster amps.
This amp is based on late ’50s tweed-covered Fender Bandmaster amplifiers with some modern modifications to improve bottom end and headroom.
Original Fender Bandmasters continue to be among the most sought after vintage amps there is, thanks to its combination of vintage aesthetics and sound. Now Fender makes these rare amplifiers more accessible for modern players and made some necessary tweaks to meet the demands of modern guitarists.
At the heart of this amplifier are 3 12AX7 preamp tubes and 2 6l6 power tubes. The amp’s circuitry faithfully reproduces the classic 5E7 circuit, pumping around 26 watts through 3 Fender exclusive alnico-magnet speakers designed by Jensen (P10R-F). The amp and speaker combination is voiced to have a warm and sensitive response.
The ’57 Bandmaster is a flexible utility amp, with 2 channels for microphone and instrument and 4 total inputs (2 per channel). Like the original, control is kept to minimum, with basic EQ for the instrument channel (Treble, Bass, Presence, Volume) and a simple volume knob for the microphone channel.
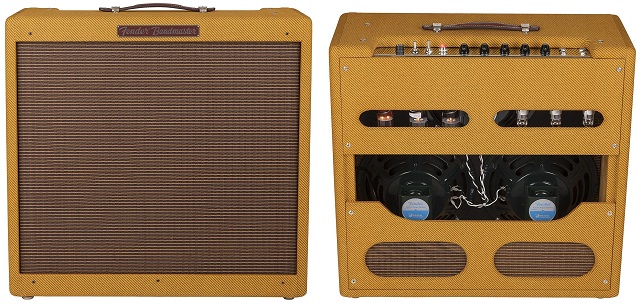
Finally the exterior of the amp is meant to be as durable and elegant as the original, it features a finger-joined solid pine cabinet covered covered with great looking Tweed. Other embellishments include chicken-head knobs and a special deluxe fitted cover.
Checkout the official video demo:
Fender wraps up the product information of the amp by saying: “The Bandmaster amp’s harmonically rich clean tones are perfect for vintage rock, blues and country styles, and its naturally touch-sensitive overdrive tone sounds electrifying—especially when cranked up.”
Being part of their Custom series amps, the Fender ’57 Bandmaster doesn’t come cheap and is currently retailing online for around $2500.
Related News:
Fender The Edge Deluxe Combo Amplifier
Fender Pawn Shop Special Vaporizer
Fender Pawn Shop Special Ramparte
Fender makes some of the best blues tube amps!

If you’re looking for a more affordable Tube Amp then see this roundup.

See our Guitar Headphone Amp Report – they come with effects and plug directly into your headphones.