Today we have a guest article written by Joffre Essley about ways to soundproof a room.
Understanding Your Acoustic Requirements
A musician who will be soundproofing a room needs to start with a clear understanding of his or her goal. Different musicians will have different needs. If this room is to serve the needs of a variety of musicians then some thought should go into the needs of all these musicians.
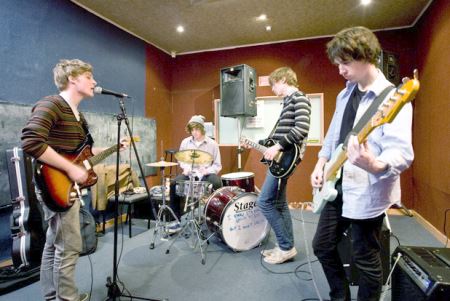
Take the case of a rock band with a heavy reliance on amplification and reverb and a strong desire to feel the sound as well as hear it. They might need to keep the sound away from the neighbor’s ears but they don’t want to spare themselves. The surfaces in the room need to support that, which means there need to be hard walls. Sound has to bounce back for this type of set up to work, and it won’t do to have every inch of wall padded.
Conversely a recording studio needs to severely control all the sound and this is difficult with lots of hard surfaces redirecting the energy of the sound. A sound room will have lots of acoustic foam and soft surfaces the sound waves. Hard surfaces can be introduced as portable stands, so that sound engineers can experiment with different placements so that the needs of both the recorder and the recorded are met.
Both a jam room and a recording studio will have to be designed for near total containment of the sound. In the case of the studio the goal is to prevent all sound from coming in. In the case of the jam room it is to prevent all sound from leaving the room. This means there are different requirements when soundproofing a room for recording or rehearsing.
The needs of most musicians can be met with something between these two extremes. My wife gives voice lessons. She needs to keep out the sounds of the lawnmower and her students shouldn’t have to listen to strange reverberations caused by the acoustic properties of the room. Otherwise her music room varies little from any other room in the house.
A bagpipe player in an apartment might need to lean towards the jam room level of design, while an oboe player in a detached house can be satisfied with a private room with a good seal under the door.
Improving the Sound Qualities of Your Music Room
Let us first consider the needs of the average musician. He wants to be able to play without disturbing the house. He wants to hear the music without awkward echoes. He doesn’t want to have to play over noisy appliances.
Here the plan is to simply modify the acoustics of a normal room. This isn’t noise elimination it is noise reduction. Its aim is good acoustic performance not perfect acoustic performance.
There are six basic strategies that he or she can employ to improve his room:
- Seal
- Isolate
- Dampen
- Trap
- Disperse
- Focus on Convergences.
Seal
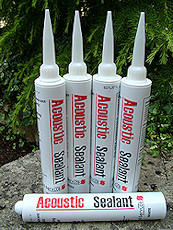
The music we make principally travels through the air. When it hits a hard surface it bounces back. Only a portion gets absorbed into hard surfaces. This means that air leaks between your music room and the outside world are the principle source of music going out and noise coming in. That is why closing a window or a door makes such a difference. What is needed here is to complete the seal. Add a weather strip or floor sweep to the bottom of your door. Caulk around the window frame. Place a temporary cover over the air ducts.
Isolate
Sound vibrations moving through a hard surface, like a speaker base, will easily transfer to another hard surface, like a floor. Isolation involves separating hard surfaces, either with an air gap, or with something soft and pliable, like carpeting. This might need to happen outside your music room. If you can feel washing machine vibrations while playing then some kind of rubber mat or isolators under the feet of the washer might be in order.
Dampen
Soft materials are poor conductors of sound. Sound wave hit the soft material and all its energy is expended trying to move the material around. Some materials are particularly good at this and an acoustic catalog will be filled with expensive materials that will set you back as much as your instruments and may be well worth it. In general more is better and weight matters. Heavy drapes will dampen the sound energy better than light drapes. Dense foam will do more than light foam.
The walls of the sanctuary of my church have large fabric-covered panels filled with foam. It is about an inch-and-a-half thick and it isn’t even acoustic foam, but it does a remarkable job at softening the sound that comes off of the walls.
Trap
Sound waves have a specific amplitude and frequency. This gives them a shape, of sorts. By regulating the size of an opening we can control which frequencies pass through. This is the basic science behind woodwinds. The depth and size of the hole determines the pitch.
A sound trap works in reverse. Instead of emitting only a certain pitch it only allows a certain pitch inside. There is a fancy name for this, a Helmholtz Resonator. I sound smart just saying it.
A sound trap usually looks like a long tube, or maybe a gourd or bottle shape. It has one opening. Sound of a certain frequency goes in and doesn’t come out. This means that there is less of that frequency floating around your studio. Variations of this include resonators with multiple holes, all different sizes, so that multiple frequencies are trapped.
This is an especially effective strategy at dealing with bass notes. Heavy bass sounds are difficult to eliminate and tend to travel through the walls and right to the people who don’t want to hear your music. A bass trap will catch some of these, reducing, but not eliminating that sound.
Disperse
Consider a wave hitting a wall. On big wave hits the wall, and one big wave comes off the wall. Now consider a wave hitting a wall covered with small humps. The sound waves hitting the small humps will bounce off at different angles and the effect is to convert one big wave into lots of small waves. These small waves will be out-of-phase with each other so many of these waves will dissipate as they run into their neighboring waves. A heavily textured paint will have this effect.
On a larger scale something similar happens in a concert hall. The walls of a concert hall are rarely straight. They are made up as a bunch of small walls running at different angles. The sound will still bounce off the walls but the waves will be broken up into smaller units.
Focus on Convergences
Sound will hit a wall at different angles but the sound coming in at a low angle of incidence will bounce off at a shallow angle. As multiple waves hit the sound energy tends to collect along the walls with lots of sound travelling along the walls. We can disrupt this flow if we place soft materials sticking out from the walls. These can be foam panels or drapes or just about anything that transmits sound poorly.
This is also why sound traps tend to be placed along walls or in corners. They are more effective there.
Corners are another convergence point. Sound hitting at a corner will bounce of two walls and will often create a condition where two waves in phase will meet and double the amplitude. This is bad. You don’t want this. Therefore some foam placed where walls meet, or where three surfaces come together, will have a disproportionate effect in improving the sound quality of a room.
Total Containment
Now let me move on to the room that needs to be totally isolated.
I will not go into the full details here. You will need to look elsewhere for that.
The same strategies employed above are employed for a total containment but with a lot more effort and money. The big difference is that you need to create a room within a room. There will an interior set of walls, an interior floor and an interior ceiling and these will have no hard connection to the existing structure. The framing for the interior room will either not connect directly to the exterior or any connections will have a dampening material between them. No connection is best of all, because even the nail going through a rubber pad can transmit sound between two boards.
Between the inner room and the outer room will be insulation and air gaps. Each room will have its own door, so you have to open two doors to get into the room.
Something similar but cheaper can be created by making the interior room out of fabric. Think of a four poster bed with a mosquito netting draping over the mattress. This is the effect you are going for.
Since this will give a totally soft enclosure the sound might be dead. Hard surfaces can be brought into this environment. You can hang plywood inside the fabric walls and create the hard surfaces you need. You can even float a hardwood floor on top of a heavy carpet pad.
A word of caution about this approach: use fire rated materials. Such a soft room, with only one exit, could become a death trap. Using fire rated materials and proper safety procedures should make this a safe work environment.
This cheaper approach can also be disassembled with ease. When it comes time to move your lovely sound room probably won’t add to the value of your home and may even be a liability if future buyers have to figure in the cost of unbuilding your wonderful sound room.
About the Author:
Joffre Essley is not a musician but he is a curmudgeon when it comes to sound. He blogs about house design and architecture and is an automotive engineer by trade.
If you have any questions about soundproofing, please feel free to post in the comments area below.
This is very amazing, it really helps me a lot in terms of ideas and procedures about soundproofing a room. it is very informative and you have done a really great job!