The purpose of this guide is to give you an understanding of the basic equipment you’ll want to have for recording at home to your computer.
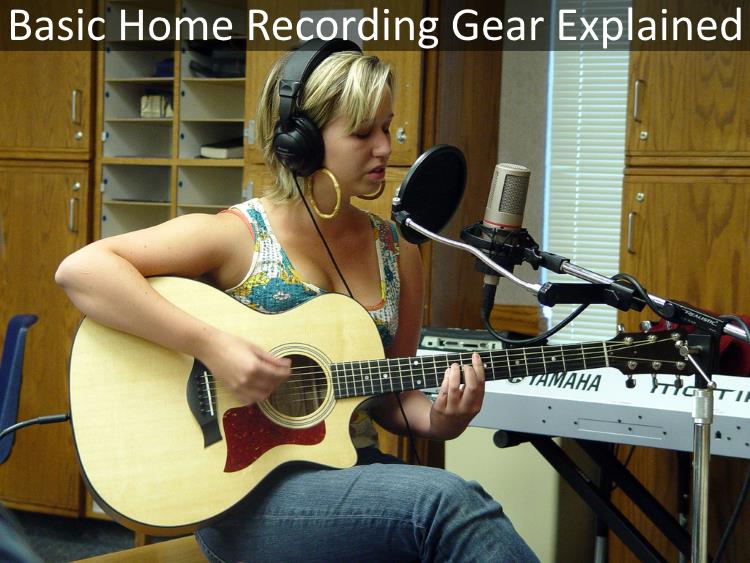
Image credit: midiman
This guide isn’t about recording platinum albums, instead it provides you with what you need for these purposes:
-
Getting your ideas recorded so you don’t forget them;
-
Demo recordings for getting gigs or sending to record labels;
-
Producing your tracks for SoundCloud, YouTube videos or for release through services like iTunes;
-
And finally, but no less important, practicing your recording skills so that you’ll be more proficient when it comes time to record in a professional recording studio.
Your Computer
These days most off-the-shelf PCs and Macs will do just fine for recording so I won’t go into too much detail because the computer you already own is probably good enough to begin recording with.
The one thing I will say is that it’s good to have plenty of RAM. You may be able to get by with as little as 2GB for basic purposes, but if you start loading up lots of plugins for effects or virtual instruments then you might want to look at expanding the amount of memory your computer has – but for now just start with what you have and worry about upgrading later if it becomes necessary.
Update Feb 2017: I just found an interesting guide on building your own rackmount PC for recording – if you’re interested you can see it at Infamous Musician.
Recording Software
You don’t need to spend a lot of money on recording software, or DAWs (Digital Audio Workstations) as they’re often called, to get started – here are a couple of excellent free options to begin with:
-
Audacity
This is a great option for starting out and it will run on Mac, PC, and also Linux. The interface is intuitive and easy to use making it a great option for beginners and more experienced musicians alike. There are tons of effects available for it and you can use and VST, LV2, LADSPA and Audio Unit plugins with it for additional effects. The only downside is that it currently doesn’t support VSTi (virtual instruments) and VST3 yet, but that won’t be much of an issue when you’re just starting out.
You can get Audacity for free at web.audacityteam.org.
-
Pro Tools First
Pro Tools is the DAW you’ll find in most of the high-end studios as well as many home recording setups, and now for the first time in more than a decade a free version, designed specifically for recording novices, has been released. This free version will let you record up to 16 tracks in total and a maximum of 4 tracks simultaneously. It comes with over 20 plugins for effects and sound processing and a virtual synth for virtual instruments such as pianos, strings, brass, percussion, woodwind, electronic synths, drums, basses, and even guitar. If all that’s not enough for you then you can also make in-app purchases for additional effects and instruments including stompbox modelers.
Free downloads have begun but you’ll need to register for an invitation first at apps.avid.com/ProToolsFirst.
These aren’t your only options but there are far too many recording applications available to list here, so if you want to see what else is available then Music Radar has an excellent roundup to guide you in the right direction.
Audio Interface
Although your computer may have a built-in microphone, mic input and line input, these are generally terrible for recording music so you’re going to need an audio interface to capture audio.
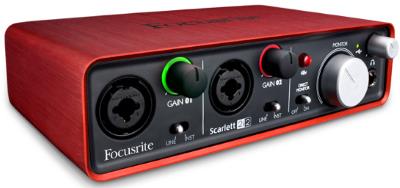
How they work is that you plug your microphones and instruments into your audio interface, it then digitizes the sound, then it passes the digital audio to your recording software – this is usually achieved with a USB or FireWire connection from your interface to your computer.
If you’re new to home recording then you might find a lot of the jargon associated with audio interfaces confusing, but to get started all you really need to know is how many channels can it record simultaneously, the sampling frequency (how many times per second it takes a digital snapshot of the sound), and the bit depth (the digital resolution of volume) – here’s what you need for different purposes:
-
Recording guitar & vocals
You’ll only need a basic 2 channel interface.
-
Recording demos
Any interface will produce the necessary quality for this which is a minimum of 44.1 kHz sampling frequency and 16 bit depth (that’s what CDs use) – in fact most will have 24 bit depth.
-
Recording songs for commercial release
The basic standard here is a bit depth of 24 bits, most people can only hear up to 20 bits of volume differences so this is more than enough, and a sampling frequency of 48 kHz that will allow you to record frequencies up to 24 kHz which is above most adults hearing range.
You can get interfaces with sampling rates of 96 kHz and even 192 Khz. The reason for being able to record frequencies which are well outside human hearing range is a bit technical but basically it’s for producing better results when mixing a large number of channels together, although many experts say this simply isn’t necessary and I tend to agree. Don’t worry because 48 kHz will be good enough when you’re starting out and the higher rates will only use up more processing power, memory, and disk space than you need at this stage.
-
Recording drums
If you’re going to record a drum kit then I highly recommend you use an audio interface with at least 8 channels. This will give you much better separation for each of the drums by isolating each one on a different channel. This will give you much more control both in editing and the final mixdown. This approach will also make it possible for you to replace your drum sounds with professionally recorded samples using a drum replacer plugin.
In my opinion the best value for money interface for recording 8 channels simultaneously is the Focusrite Scarlett 18i20.
-
If you’re still a little unsure about the topic of recording interfaces (and even if you’re not) then take a look at this easy-to-follow roundup of cheap audio interfaces that are quite well suited for beginners.
Microphones
This is a topic which can get a little confusing if you’re just starting out, particularly when there are so many types of microphones and so many models available in each category, however all you’ll need to know about are the two main types – Dynamic & Condenser mics.
-
Dynamic Mics
Dynamic microphones, which are the type you usually use at live gigs, are great for recording loud sound sources such as amplifiers and drums. Chances are that if you have your own PA system then you’ll already have plenty of these. The most popular one is the Shure SM58 and you can usually buy them for under $100. In fact the SM58 is perfectly fine for recording vocals on demos and that’s exactly what my band used to use.
-
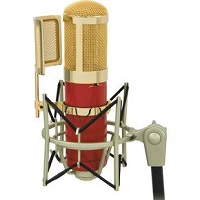
Condenser Mics
Condenser microphones are brilliant for recording vocals and acoustic guitar. Unlike dynamic mics, these require a power source to work – some use batteries but the most common source is called Phantom Power, so if you’re going to use these then you’ll have to make sure that your audio interface provides it. There’s nothing special you have to do other than plug the mic into an input on your interface which provides phantom power and make sure the phantom power is turned on (some advanced interfaces turn it on automatically for you).
For a more detailed explanation of microphones check out this article: The Different Types Of Mics And Their Uses.
Studio Monitors
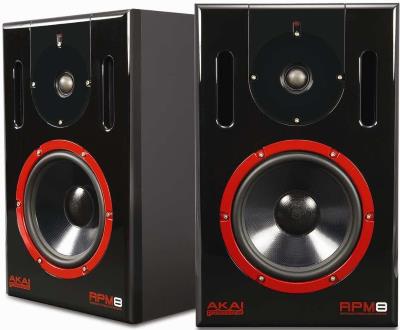
These are special kinds of speakers used for playing back your music when mixing and editing your recordings. They’re different to ordinary speakers because they aim to produce a flat response across all frequencies – ordinary Hi/Fi speakers often try to ‘improve’ the sound but that’s exactly the opposite of what you want when you’re trying to produce a good recording.
If you can afford a few hundred dollars for studio monitors then you’ll end up with better sounding music than you will with ordinary computer speakers which generally have poor frequency responses, or ordinary headphones which create an artificial stereo image.
For more information on this topic read the roundup: The Best Studio Monitors For Under $500.
Headphones
If you do any recording using microphones then you’ll have to have a set of headphones. This is so you can listen to the song while recording a new part without the entire mix being picked up by the microphone – this way each track you record won’t have spillover from other tracks which when it happens makes the final mix difficult, and sometimes outright impossible, to get right.
You don’t need to spend a lot of money on these because you just need to be able to hear the backing tracks you’re recording over – they don’t need to be super high quality for this purpose.
Summary
Although there is an almost endless list of equipment and software you can use for recording, the list of gear above is all you need to get started and you can always get more later as your recording skills become more sophisticated.
For a more thorough list of recording gear see The Extensive Home Recording Studio Equipment List.
If you have any questions then feel free to ask in the comments below and I’ll do my best to answer them.

Thanks for sharing home recording setup. I am playing guitar from one year. Now I am interested and also confident about the recording. I have learnt playing guitar by following so many online tutorial videos. Now I have purchased one Best Guitar tone (my dream guitar) and want to record with this one. Excited for the recording now.
You forgot to mention that you need closed back headphones when recording – if you use open back ones then your backing tracks will spill over into the vocal track or whatever you’re currently recording.